


Seagate F3 Data Recovery: Translator Recovery Solution in Utility
How to use the Seagate translator recovery solution in utility when doing a Seagate F3 data recovery
When doing a Seagate F3 data recovery, it is good to know that hard drives are a series of hard drives
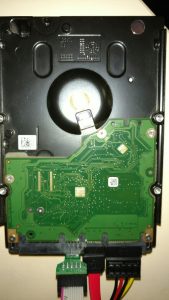
Seagate F3 hard drive with ATA and COM connections
that can work with both ATA cables and COM modes when there is an issue with the drive. The Seagate F3 series contains a number of Seagate drives including: Barracuda 7200.11 -DM Series, Barracuda 7200.12 Series, Barracuda 7200.14 Series, Barracuda ES.2 Series, Barracuda 5400.6 Series, Momentus 5400.5 Series, Momentus 7200.3 and Momentus 7200.4 Series, Barracuda LP Series, Barracuda Green Series, Barracuda XT Series.
When the data contained on your Seagate F3 is needed, there is a procedure of translator recovery for F3 drives in PC-3000 when the drive has a translator regeneration problem. The symptom of such translator issue is when the ID is exact but there is sometimes damages to the module 002B and the capacity stays at 0.
Backing up the modules when carrying out a Seagate F3 data recovery

Random logical test on a Seagate F3 at the beginning of the data recovery procedure
Before you carry out any procedure on the hard drive as part of your Seagate F3 data recovery, you need to start by making a back up of the modules. This is what the back up should look like:
Test : HDD resources backup
Folder: C:\Program Files\ACE Lab\PC-3000\Bin\!Profiles\SgF3\F3 Arch (common)\ST31000528ASQ-AP24-6VP1RS9G\Data\SABackup\
Reading ROM to profile folder
Folder: C:\Program Files\ACE Lab\PC-3000\Bin\!Profiles\SgF3\F3 Arch (common)\ST31000528ASQ-AP24-6VP1RS9G\Data\SABackup\ROM\
Result……………………………. : Ok
Reading DT to profile folder
Folder: C:\Program Files\ACE Lab\PC-3000\Bin\!Profiles\SgF3\F3 Arch (common)\ST31000528ASQ-AP24-6VP1RS9G\Data\SABackup\CPDir\
DT 0000 (Flash ROM), Read Adaptive Parameters File (RAP)………….. : Ok
DT 0001 (Flash ROM), Controller Adaptive Parameters File (CAP)…….. : Ok
DT 0004 (Flash ROM), Servo Adaptive Parameter File (SAP)………….. : Ok
DT 0005 (Flash ROM), Servo Firmware Table……………………….. : Ok
DT 000A (Flash ROM), Seek Profile………………………………. : Ok
DT 0013 (Flash ROM), Dependent Zone Table for User Area…………… : Ok
DT 0014 (Flash ROM), Dependent Zone Table for System Area…………. : Ok
DT 0015 (Flash ROM), Flash ROM…………………………………. : Ok
DT 001B (Flash ROM), Dependent Zone Group Tables for User Area…….. : Ok
DT 001C (Flash ROM), Dependent Zone Group Tables for System Area…… : Ok
DT 001D (Flash ROM), VBAR Configuration File…………………….. : Ok
DT 001E (Flash ROM), Zone Format Parameters File…………………. : Ok
DT 0000 (RAM), Read Adaptive Parameters File (RAP)……………….. : Ok
DT 0001 (RAM), Controller Adaptive Parameters File (CAP)………….. : Ok
DT 0002 (RAM), Zone Table……………………………………… : Ok
DT 0004 (RAM), Servo Adaptive Parameter File (SAP)……………….. : Ok
DT 0005 (RAM), Servo Firmware Table…………………………….. : Ok
DT 0006 (RAM), Servo Flaw Table………………………………… : Ok
DT 000A (RAM), Seek Profile……………………………………. : Ok
DT 0013 (RAM), Dependent Zone Table for User Area………………… : Ok
DT 0014 (RAM), Dependent Zone Table for System Area………………. : Ok
DT 0015 (RAM), Flash ROM………………………………………. : Ok
DT 0016 (RAM), Drive Configuration Table………………………… : Ok
DT 0017 (RAM), Temperature Control Configuration…………………. : Ok
DT 001B (RAM), Dependent Zone Group Tables for User Area………….. : Ok
DT 001C (RAM), Dependent Zone Group Tables for System Area………… : Ok
DT 001D (RAM), VBAR Configuration File………………………….. : Ok
DT 001E (RAM), Zone Format Parameters File………………………. : Ok
DT 001F (RAM), RW working user preamp table……………………… : Ok
DT 0020 (RAM), RW working system preamp table……………………. : Ok
DT reading process completed
Result……………………………. : Ok
Reading modules to profile folder
Folder: C:\Program Files\ACE Lab\PC-3000\Bin\!Profiles\SgF3\F3 Arch (common)\ST31000528ASQ-AP24-6VP1RS9G\Data\SABackup\ModDir\
Will be skipped : 000C, 000E, 000F, 0022, 0023, 0024, 0025, 002C, 002D, 002E
Module 0000, Reserved Defect Table (SA defect table)……………… : Ok
Module 0001, Drive Information File (DIF)……………………….. : Ok
Module 0002, Performance Parameter File (PPF)……………………. : Ok
Module 0003, Primary Defect File (P-List))………………………. : Ok
Module 0004, Servo Adaptive Parameter File (SAP)…………………. : Ok
Module 0005, Manufacturing Information File (MIF)………………… : Ok
Module 0006, Read Adaptive Parameters File (RAP)…………………. : Ok
Module 0007, Controller Adaptive Parameters File (CAP)……………. : Ok
Module 0008………………………………………………….. : Ok
Module 0009, SMART Configuration File…………………………… : Ok
Module 000A, SMART Data File…………………………………… : Ok
Module 000B………………………………………………….. : Ok
Module 000D………………………………………………….. : Ok
Module 0013, Disc Registry File (settings, security, etc)…………. : Ok
Module 0015, BGMS File (Directed Offline Scan)…………………… : Ok
Module 0016………………………………………………….. : Ok
Module 0017………………………………………………….. : Ok
Module 0019, Log File…………………………………………. : Ok
Module 001A, Log File…………………………………………. : Ok
Module 001B, Log File…………………………………………. : Ok
Module 001C………………………………………………….. : Ok
Module 001D, Physical Overlay File 0……………………………. : Ok
Module 001E, Physical Overlay File 1……………………………. : Ok
Module 001F, Physical Overlay File 2……………………………. : Ok
Module 002A, Saved Mode Pages (HDD settings)…………………….. : Ok
Module 002B, R/W Operating Parameters (translator, etc)…………… : Ok
Module 0033………………………………………………….. : Ok
Module 0034, Packed CONGEN XML definition……………………….. : Ok
Module 0035, SMART Data……………………………………….. : Ok
Module 003A………………………………………………….. : Ok
Modules reading process completed
Backup of service information completed.
Once the back up is done, it will give you the opportunity to revert to the original state if you need to.
Logical scan as part of a Seagate F3 data recovery procedure
This is a part report of a logical scan done for a faulty hard drive when doing the Seagate F3 data recovery. This hard drive came into our data recovery centre in London:
Model : ST31000528ASQ
Serial : 6VP1RS9G
Firmware : AP24
Capacity : 931.51 GB (1 953 525 168)
Logical scan
****************************************************************
Initial LBA……………………….. : 0
Final LBA…………………………. : 1 953 525 167
Data exchange mode…………………. : UDMA133
Surface verification……………….. : Yes
Random read……………………….. : Yes
Cycling number…………………….. : 1000
Writing…………………………… : No
Reading…………………………… : No
HDD cache RAM test…………………. : No
Scan direction…………………….. : Forward
Pass count………………………… : 1
Save defects………………………. : No
Don`t search sector where error occured. : No
HDD timeout……………………….. : 200 ms.
One LBA commands timeout……………. : 30 ms.
****************************************************************
Pass……………………………… : 1
Test……………………………… : Surface verification
ERROR! LBA : 2 292 813 Verify sectors ext error HDD Redynes timeout (30)
ERROR! LBA : 2 292 814 Verify sectors ext error HDD Redynes timeout (30)
ERROR! LBA : 2 292 819 Verify sectors ext error HDD Redynes timeout (30)
ERROR! LBA : 2 292 822 Verify sectors ext error HDD Redynes timeout (30)
ERROR! LBA : 2 292 827 Verify sectors ext error HDD Redynes timeout (30)
ERROR! LBA : 2 292 832 Verify sectors ext error HDD Redynes timeout (30)
ERROR! LBA : 2 292 833 Verify sectors ext error HDD Redynes timeout (30)
ERROR! LBA : 2 292 834 Verify sectors ext error HDD Redynes timeout (30)
ERROR! LBA : 2 292 868 Verify sectors ext error HDD Redynes timeout (30)
ERROR! LBA : 2 292 871 Verify sectors ext error HDD Redynes timeout (30)
ERROR! LBA : 2 292 890 Verify sectors ext error HDD Redynes timeout (30)
ERROR! LBA : 2 292 913 Verify sectors ext error HDD Redynes timeout (30)
ERROR! LBA : 155 103 232 Verify sectors ext error HDD Redynes timeout (30)
Status……………………………. : Ok
Test……………………………… : Random read
Status……………………………. : Ok
Duration………………………….. : 2:49:08
This report gives you an idea of the state of the hard drive as it will also give you a defect list about it. Here are the first 50 defects reported out of 663 defects for the Seagate F3 hard drive:
Translator Recovery for Seagate F3 Data Recovery
In the Seagate F3 architecture ATA – 0 , you need to be in the Service Information and Work with Service Area. Then click on the Translator and it will give you five options: Clear Format Corrupt flag, Translator Regeneration, Recover Translator, Single LBA position adjustment and Convert LBA to CHS.
First try to run a translator regeneration. If, once it has run, you can only read the first part of the surface and end up with the message: “Translation “fork” direction detection ambiguity ! Correct it manually !” this means that the PC-3000 cannot detect bad sectors and these may be located before it stopped. This is when you need to run a translator recovery.
The first thing you need to focus on is to find the first unreadable sector where the procedures has stopped. You will find the number of the sector in the procedure log. You then open sector editor and try to read some sectors that are located before the sector mentioned on the log. Once you find the last readable sector, you then need to try to find the first unreadable sector. The way you do this is by opening the hard drive read and write options, and select Use Utility. You then click No when utility asks you is you would like to Transmit date in spite of read error. This will give you the opportunity to look inside the sector and click yes if it is unreadable again. Then , two situations will be presented: Right “fork” and left “fork”.
The right “fork” is the first unreadable sector containing bytes of all zeros or sevens. After this first unreadable sector, there could be other sectors which are similar. And before this first unreadable sector, there are sectors with data.
The left “fork” is the first unreadable sector containing data but it has before it some sectors with zeros.
You then need to add in translator all sectors with zeros, including the right “fork” sector and the left “fork” sector. Once you have detected the sectors which need to be added into translator, the next stage is adding them.
First, open Defects List from Tools->Defect List edit and create a new defect list by clicking first icon on top panel. Then add region and enter the first bad sector number together with the number of bad sectors afterwards.
When defective sector has been added into Defect list, you then need to right click defect record and select the command “Hide to slip list”. You can then proceed with the translator recovery for the bad sector you have added and repeat the same procedure of each sector.
The defect infomation transfer from A list will give you the following report:
F3 T>/
F3 T>m0,6,3,,,,,22
Max Wr Retries = 00, Max Rd Retries = 00, Max ECC T-Level = 16, Max Certify Rewrite Retries = 14E8
User Partition Format 4% complete, Zone 00, Pass 00, LBA 00009A64, ErrCode 00000080, Elapsed Time 0 mins 30 secs
User Partition Format Successful – Elapsed Time 0 mins 30 secs
Zone re-format was skipped.
F3 T>
Once done, the Seagate F3 data recovery is complete. All the user’s data is accessible and you are able to transfer the information onto another drive.