
Failed Hard Drive Diagnostic: Basic Check When Attempting a Data Recovery
How to carry out a failed hard drive diagnostic with a basic check?
How to diagnose a failed hard drive?
If your hard drive is not working properly or not letting you access the stored data on it, it is possible to carry out a failed hard drive diagnostic. Here are some important steps to help you when carrying out a failed hard drive diagnostic in order to avoid making mistakes and losing the user’s data.

To power or not to power
It is not recommended to power the failed hard drive when starting the diagnostic since this may lead to the platters being scratched. The platters are the circular disks on a hard drive on which magnetic data is stored. The rigidity of the disks is what gave hard drives their name. The first thing to do is to hold the hard drive in one hand and shake it carefully from side to side to check if there any moving parts inside the hard drive. If noises can be heard from moving parts inside, and if you feel capable of opening the drive in a dust free clean room environment with permission from the owner, you can then check the internal parts, making sure you wear appropriate latex gloves so that your fingerprints don’t transfer on the drive.
Sounds good?
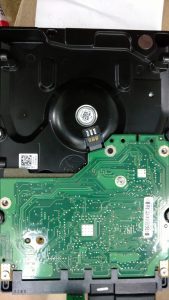
If you can’t hear any suspicious sounds when shaking the hard drive, the next step to check the logic board of the hard drive. Make sure you check the label on top of the hard drive to check for any signs showing that the drive has already been opened before you. Then, the best thing to do is to take off the board and check the state of its pads on the side ie the filter that trap dust and dampness as these may have worn out.
Once these have been cleaned with a rubber eraser or 100% alcohol, you need to check the logic board, especially if you are carrying out a hard drive diagnostic on a new drive with adaptative data in ROM chip, to see if you can find any broken fuse or components unsoldered on the board. Once this is done, you need to put the Printed Circuit Board (PCB) or logic board back in the hard drive.
How to clean the platters when working out a failed hard drive diagnostic?
If your drive has a bad reading ability, this can be caused by some sort of contamination of the platters. The best thing to do is to try to clean them and this is how you can do it:
In order to clean the platters, you need a painting brush and spirit such as 100% alcohol. We use the 3M™ Novec™ 71IPA Engineered Fluid to clean platters on a hard drive in our workshop for data recovery.
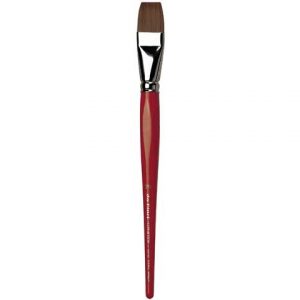
Painting brush used to clean the hard drive platters
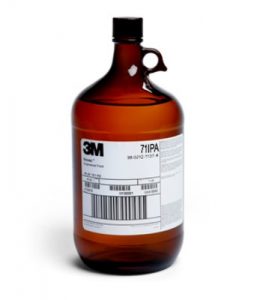
3M 71IPA fluid to clean the platters of the hard drive during diagnostic.
As stated by the manufacturer, it is a hydrofluoroether, methoxy-Nona fluoro butane (C4F9OCH3), in an azeotrope-like formulation with isopropanol. This fluid is ideal for light-duty cleaning and degreasing tasks. It is intended to replace ozone-depleting materials such as CFC-113, HCFC-14lb, and 1,1,1-trichloroethane in many applications. It has a zero ozone depletion potential and other favorable environmental properties.
Novec 71IPA fluid
Novec 71IPA fluid has a low toxicological profile, with a time-weighted average exposure guideline of 750 ppm for the 3M™ Novec™ 7100 Engineered Fluid component. The increased polar soil solvency and low surface tension, nonflammability and constant composition during boiling of Novec 71IPA fluid make it ideal for precision and specialty cleaning and rinsing for removal of particulate, fingerprints and light soils from metal, plastic and glass parts. Its main applications are precision cleaning, rinsing and drying agent, light-duty cleaning of oils, greases, waxes, fingerprints and use in combination with co-solvents for “no-clean flux” residue removal.
As for the brush, it must have a 0,7 cm diameter and be very smooth, without separately erect hairs.
The cleaning process
First, dip the brush in spirit, so that at the end of the brush has a drop of medium size, making sure the drop is kept on the brush. Then, carefully clean the platters with the brush. When you finished cleaning, lead away from the brush with spirit drop to the edge of the platters and let them dry.
A word of warning: if you will dismantle the platters, be careful. Each platter has a unique location relatively to the spindle motor and to other platters. After they have been dismantled, you require high skills to put them back together in the right place and in the right order. This is the reason why if you decide to dismantle the platters, you need to use a felt-tip pen to mark the location of the platters relative to each other, using two marks for accuracy. If unsure, let data recovery professionals do this for you.
How to tell if the heads of the hard drive are damaged when doing a failed hard drive diagnostic?
It is advisable to open the drive and look with a magnifying glass to see if the heads are still on the arm and check if they are not displaced as if you plug the hard drive, the heads could scratch the platter and make it impossible to get the data. If they are no sign or visibility of heads being displaced, you need to see if the drive is detected in the PC-3000 disk utility. Plug the drive in into one of the channel ports of PC-3000 UDMA. In our case, we will be selecting SATA 0. Turn the hard drive power supply on to make sure that the drive is initialising.
And What then?
If the drives stay busy, it means it cannot be initialised and the service area cannot be detected. If the drive goes into an initialize state (DRD / DSC) you can then run an auto detect utility to check the brand of the drive which should be displayed on the screen. So double click on the middle section. It will display the family set of the manufacturer of the drive in the utility start.
Now comes the fun part
There will be two options to run the utility, one in normal mode and one in kernel mode. In normal mode, a PC-3000 utility has detected the model, serial number, firmware and capacity of the drive. In some cases, if this information isn’t displayed, you need to run in kernel mode to try to repair the drive and try to identify if it is a mechanical problem with the head or a malfunction. If you are able to run on normal mode, you can go to tools, click on sector edit and launch it. Finally fast forward in sector edit and see if you can see any content in the editor.
Data has appeared
If all is good with sector edit and data can be seen, we come out of sector edit. We then open data extractor and create a new task. You need to select the location where you need to save the data. ( on your local hard drive for the task ) . Then create a new folder (name or job number for instance). Once you have created the folder, click ok and then another window will come up. Go to task creation – source device selection and click on PC3000 SATA0. Press next, task initialisation will be displayed with three check boxes. Remove the two hardware and software reset and press next. The task options will come up and make data copy. Once done, you select the destination drive, select file image. At this stage, in data extractor should be displayed the model of the drive, its capacity, its serial number and its firmware.
Before trying to access the files, we should create a head map and select building head map. A box will come up with select range and apply. It will create a head map (more will be explained about building head maps in another blog post).
In many cases, heads haven’t been damaged but get weak from a drop for example and cannot read. In some other case, the modules of the service area have been damaged.
Useful information and glossary to help you with a failed hard drive diagnostic
Here is a reminder of what the essential components of a hard drive are. You will need them in order to successfully carry out a failed hard drive diagnostic.
Hard drive platter:
Circular disk where magnetic data is stored. Laptop hard drives have platters made of glass while desktop computers have platters made of aluminum. And as a general rule, a hard drive has several platters which are mounted on a single spindle. 4 or 5 on average. A hard drive has more platters if its capacity is higher. As technology improves, hard drives have increasingly more platters. That enables them more storage capacity.
Hard drive PCB:
The Printed Circuit Board (PCB) supports and connects the electronic components of a hard drive using conductive tracks and pads. Capacitors and resistors are soldered on the PCB.
Hard drive spindle:
The spindles are the axis that keeps the rotating platters of the hard drive in place.
Hard drive magnets:
Hard drives have a couple of very strong nickel plated magnets, one on the top and one at the bottom. These magnets are used in the actuator that moves the arm. The head that reads and writes data to/from the platters is located on that arm.